
Labels: 35mm, Art, Camera, Diana, new york, NYC, Photography, Travel
 Rockefeller
 Brooklyn Bridge
 Ice skating at the Rock Center
 SoHo.. I think? It wasn't till' I was in New York that I realised SoHo means South Of Houston. NoHo is North If Houston.
 Goes without saying, Times Square
 Brooklyn Bridge
 NYC, as seen from The Empire State building
The Brooklyn Bridge

I went to New York in February but have only just got around to getting the film processed. My friend George lent me her Diana Mini, which is what I used to take these photos. They're so pretty I love them. Miss you NYC.

Labels: Art, Decor, Groupon, Moskys, Personal, Room, Sticker Sorry for the very random post, but I've got a feeling some of you arty people may like this! I'm not sure if you anybody has heard of voucher sharing website Groupon (you should definitely subscribe to them, you get cool deals from businesses in your area, like hairdressing, beauty treatments etc). I've ordered one for a spray tan before but never actually used it because I chickened out, but I saw this one for these amazing wall stickers. They're from Moskys, and it cost me £9 (as I got the voucher), but full price is £23.99. When it arrived, it came in about 50 pieces, and I was terrified about how to put it together... but I was really pleased with the results!
 It's quite cool because you can completely arrange it how you'd like, but I tried to copy the picture online as closely as I could. I also nicely got this shelf from IKEA for Christmas, fits perfectly in with the design. And with them being stickers, you can take it off whenever you feel like it, and it leaves your wall completely clean (I rearranged mine quite a few times haha)!Just a little idea for anyone wanting a change of room for 2012! x
Labels: Art, Christmas 11, Nails Feeling very festive, and had previously seen lots of Christmas themed nail art around on Tumblr, so thought I'd give it a go! I've got these nail art pens by RIO which are amazing and so easy to use. I got mine as a Christmas present a few years ago, but I think you can pick them up on eBay for about half the price! On the photo above, the purple glitter polish (I was going for a mulled wine look) was the Deborah Lippman polish I received in the December's Glossybox. Love it. The overcoat to these is a Rimmel one, not sure on the name, I think it's something like Stargazer? It was a cheap one anyway! Fingers crossed these'll last all the way through to the 25th itself!Who's excited?

Labels: Art, Fabric, Fashion, Graphics, Illustration
 On a satin white fabric, navy thread
 The oriental style fabric, again, navy thread
 White satin fabric, dip dyed with a mix of blues and greens, navy threadJust a few shots of some of the illustration I did today. It was the first time I'd properly used a sewing machine, and I loved it! So hooked. Can't wait to use it again tomorrow, or buy myself one as a cheeky Christmas present! These are just some pages from Cosmopolitan, but I'll be doing lots more! Possibly a huge, huge, A0 size one for my final piece. Who knows!
Third post in a week! Not bad! The title of my post today is a song by Eminem - Spacebound. It sums up whats going on with me now so I can really relate to it, and besides, Eminem is an all-round badass.
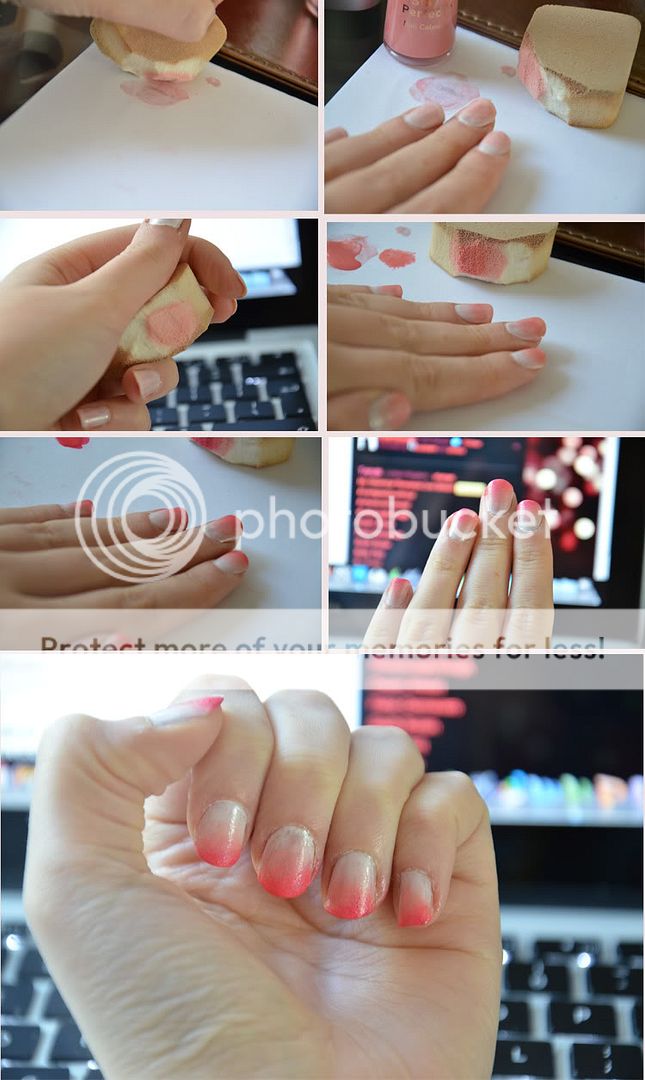
I worked this morning, so got home and didn't really have anything to do. I decided to spend hours on Tumblr (like most days) and some of the nail-art on there is really amazing. I was inspired by lots of things on there - dip-dyed hair, bleached shorts, nail art - so decided to try and combine all of that together. Gradients seem to be everywhere at the moment, and doing it on nails looks so hard!! I thought it was done with an airbrush, or with tiny tiny dots of nailpolish.. but then I discovered doing it a MUCH easier way! I wasn't too sure how it was actually going to look.. but I'm pleasantly surprised with it :)First you'll need to decide on what colours your going to use - I was torn between pink or blue, but went for pink. Gather up all of your nailpolishes in that colour range to help you decide which ones to use. The colours I used were:Sally Hansen Diamond Strength No Chip - 29 Radiant RoseNo7 Stay Perfect - 40 Sugar SyrupAvon Arabian Glow - Coral Sands17 Fast Finish - Pink GrapefruitNo7 Stay Perfect - 45 Very PetalSpectacular - Mermaid 83Obviously don't go out and buy these exact ones haha, just use whatever you've got - they should all blend together as long as they go from light to dark. I painted my first base coat with Revlon 050 - White on White to give myself a clean canvas for the colours to show up on, but it looks really pretty just clear too. Make sure that your base coat is completely dry before you put any other colours on or they will all blend together (which we don't want just yet!)Create swatches of all your colours in order, on a piece of paper or a paper plate so you can easily sponge the colour on. I used an old foundation sponge, and just cut it up (the sponges never worked for my foundation anyway aha). Dab the lightest colour you've got onto the paper and wipe away and excess polish. 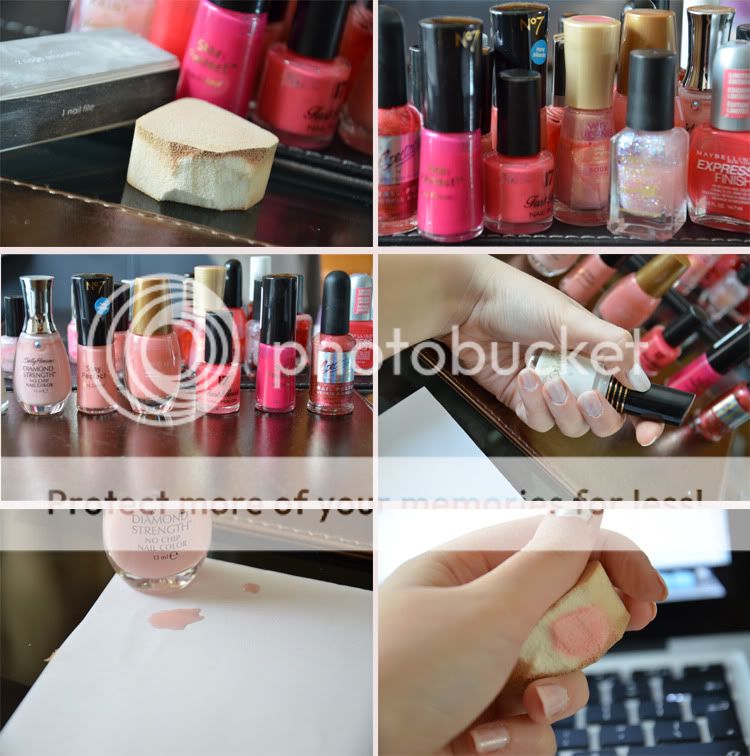 Dab it onto your nail almost all the way to your cuticle, with less pressure the nearer the bottom of your nail. I did this three times because the pink I've got is really light and I wanted to get a really solid base, but it's entirely upto you how you'd like to do it :) Again it's completely upto you how many shades of colour you'd like to use, I did 6, so it took a while for each coat to dry. Do this over with each shade, doing less and less each time until you get to the solid dark pink at the top of your nail - this will create the gradient effect.
 To top it off, I used two glitter nail polishes to make give them a sort of galactic look, I used gold (Rimmel London 651 Eccentricity) and pink (Barry M Nail Paint - 264 Pink Irridescent). I chose to use two because the gold has really nice big clumps of glitter; whereas the Barry M is very fine. I found it easier to just dab the polish straight onto the sponge and then onto the nail. I only did it at the top; but then went over the whole nail with the pink glitter.
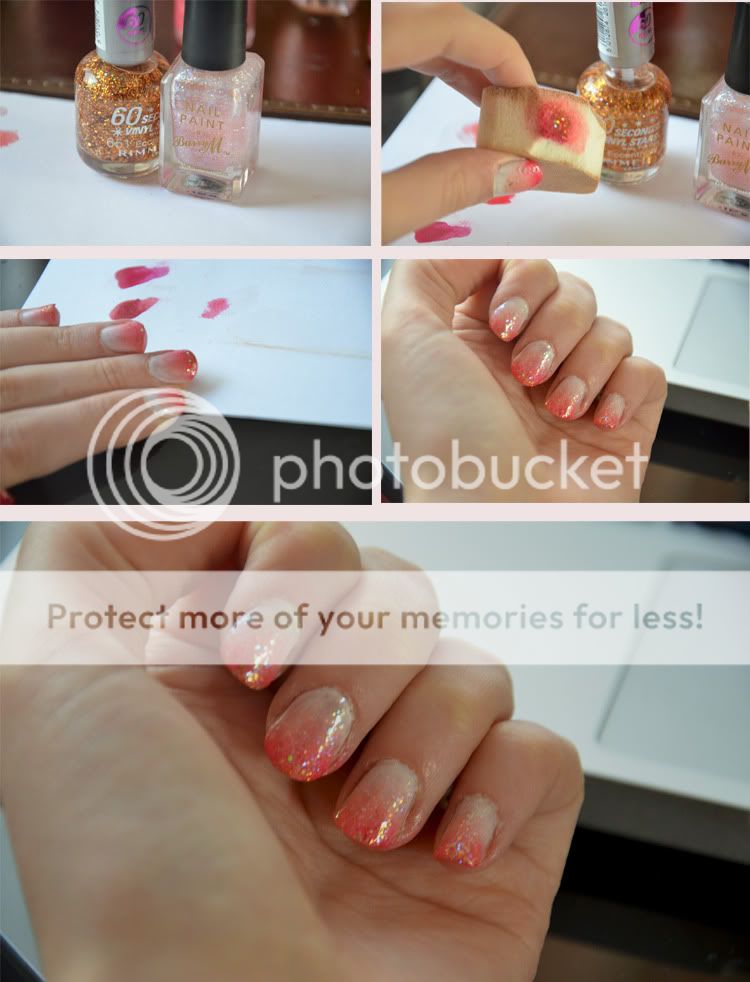 Putting a good quality top coat on is really important too, I used Sally Hansen Insta-Dry top coat (mainly because it dried all the layers in 30 seconds!) The top coat will keep your glitter stuck down instead of peeling away.Sorry the pictures aren't the best, it wasn't very sunny when I was doing it :( I did make a video too but my iMovie is being really silly so it's not letting me crop it down, but if you'd like me to put it on just message me :) If anyone has a go at this, take a picture and send me the link! I'd love to see your outcome.Ruth xx


 November 2009
